Hello. How may we help you?
-
Getting Started
- Configuring Your Management Module
- Create & Configure A New Organization
- Creating a Customized Address
- Mastering Advanced Search and Filters
- Understanding Your Organization's Homepage
- Understanding Role Function
- Dashboard Overview: Key Insights for Organizational Decision-Making
- Changing The Language
- Changing Your Password
- Editing Your Profile
- Feedback and Requests
- Frontier.cool Privacy Policy
- Managing Your Profile Menu
- Are all of my digital fabrics shared publicly?
- Does Frontier.cool’s TextileCloud™ offers a free trial plan?
- How do I change the language?
- How do I send feedback or make a request?
- How does Frontier.cool protect my privacy and keep my data secure?
- How does Frontier.cool’s TextileCloud™ accurately generate physical properties?
- How does Frontier.cool’s TextileCloud™ generates accurate texture maps?
- Why can't I download other people's 3D material files?
- Why is my asset upload unsuccessful or canceled?
- How does Frontier.cool’s TextileCloud™ generates environmental impact data with Eco-Impactor™?
- Accessing and Copying a Shared Collection
- Adding Assets to Collection in the Workspace
- Creating and Accessing Collections
- Creating and Managing a Private Digital Library on an Embed Page
- Managing Collections
- Managing Your Workspace
- Sharing Assets and Collections
- Edit Your Collection’s Cover Image
- Attaching Files to Support Asset Information
- Copying Assets To Group or Workspace
- Creating 3D Materials
- Creating 3D Materials for Fabrics with Mesh
- Creating Assets
- Creating Assets by Smart Upload
- Creating Assets with APEXFiz File
- Creating Assets with Multiple Fabric Sides
- Customizing Asset’s Cover Image
- Deleting Assets
- Digital Drape Overview
- Downloading 3D Material Files
- Editing An Asset
- Exploring the 3D Viewer
- Export Digital Library Data to Excel
- Importing TextileCloud™'s 3D Material Files Into CLO3D
- Integrate Your System With TextileCloud™ Using APIs (Application Programming Interfaces)
- Mass Data Update and Management
- Mass Upload Data
- Mass Upload Data with Multiple Fabric Sides
- Merge Material for Asset with Face and Back Side
- Navigating the Asset Library on Frontier.cool
- Printing an Asset
- Printing and Customizing Your QR Code Label
- TextileCloud™'s Supported 3D Material Files
- The Asset Library
- Understanding Texture Maps
- Updating Fabric Images with QR Code Labels
- Uploading Pre-Scanned Images
- Best Practices for Filling Mass Upload's Excel Template
- Frontier.cool's Fabric Physical Properties
- Unlock the Power of Eco-Impactor®
- Exploring the Key Features of the Thread Board on Frontier.cool
- Navigating Detailed Card Information in the Thread Board Module on Frontier.cool
- Navigating the Thread Board Module in Frontier.cool
- Start a DigitalThread™ Conversation
- Accessing Detailed Fabric Information on Frontier.cool
- Accessing Trade Events and Vendors on Frontier.cool
- Exploring the Sourcing Library Module on Frontier.cool
- Fabric Discovery and Information in the Frontier.cool Sourcing Library
-
開始使用
個人資料管理
團隊相關
工作區相關
Mood board 相關
布料資產相關
- 使用應用程式介面 (API) 將您的系統連接至 TextileCloud™
- 探索布料資產模組
- 如何操作布料資產模組
- 如何建立布料
- 如何使用智慧上傳建立布料
- 如何用上傳已預掃描影像建立布料
- 使用 APEXFiz 檔案建立數位資產
- 了解TextileCloud™所支援的 3D 布料檔案
- 如何建立3D布料
- 如何下載3D布料以供設計或生產流程所需
- 建立網格布料的3D Material
- 編輯您的數位布料
- 自訂布料資產的封面圖像
- 如何列印布料資產的Swatch
- 將布料資產複製到團隊或工作區
- 如何批量上傳以建立布料
- 如何大量更新布料資訊
- 了解紋理貼圖(6 Texture Maps)
- Digital Drape概覽
- 如何列印與客製布料的 QR Code 標籤
- 如何建立雙面或三層數位布料
- 時尚與紡織產業的永續轉型工具: Eco-Impactor®
- 如何刪除布料
- 探索3D檢視器: 布料採購、行銷和設計不可或缺的工具
- 如何使用QR Code標籤更新您的布料資訊
- 如何將TextileCloud™的3D布料檔案導入CLO3D
- 如何批量上傳雙面或多層布料
- 如何將正面布與背面布合併成雙面布
- 如何為布料新增附件使其資訊更為完整
- 如何將數位布料匯出成Excel檔
- Frontier.cool的布料物理數據介紹
- 如何填寫批量上傳的Excel模板
- 探索Frontier.cool的Sourcing Library 模組
- 探索Sourcing Library中的布料與相關資訊
- 了解Sourcing Library中布料的詳細資訊
- 了解Sourcing Library中的展會展示功能
- 如何註冊並登入 FabriSelect™
- 數位化您的布料採購流程-FabriSelect™
- 探索FabriSelect™ 的儀表板
- 如何使用FabriSelect™
- 如何用FabriSelect™ 建立和分享資料夾
- 如何在FabriSelect™ 建立會議記錄
Creating 3D Materials for Fabrics with Mesh
Introduction
For certain fabrics or apparel, mesh may be present, and it's crucial to accurately detect the mesh to best visualize the material. This guide will provide the best practices for creating 3D materials with mesh.
Best Practices For Creating 3D Materials with Mesh
- Prepare the Fabric
● Use a contrasting color for the fabric and the swatch/background.
●We recommend using a white or black swatch as the background to ensure optimal results.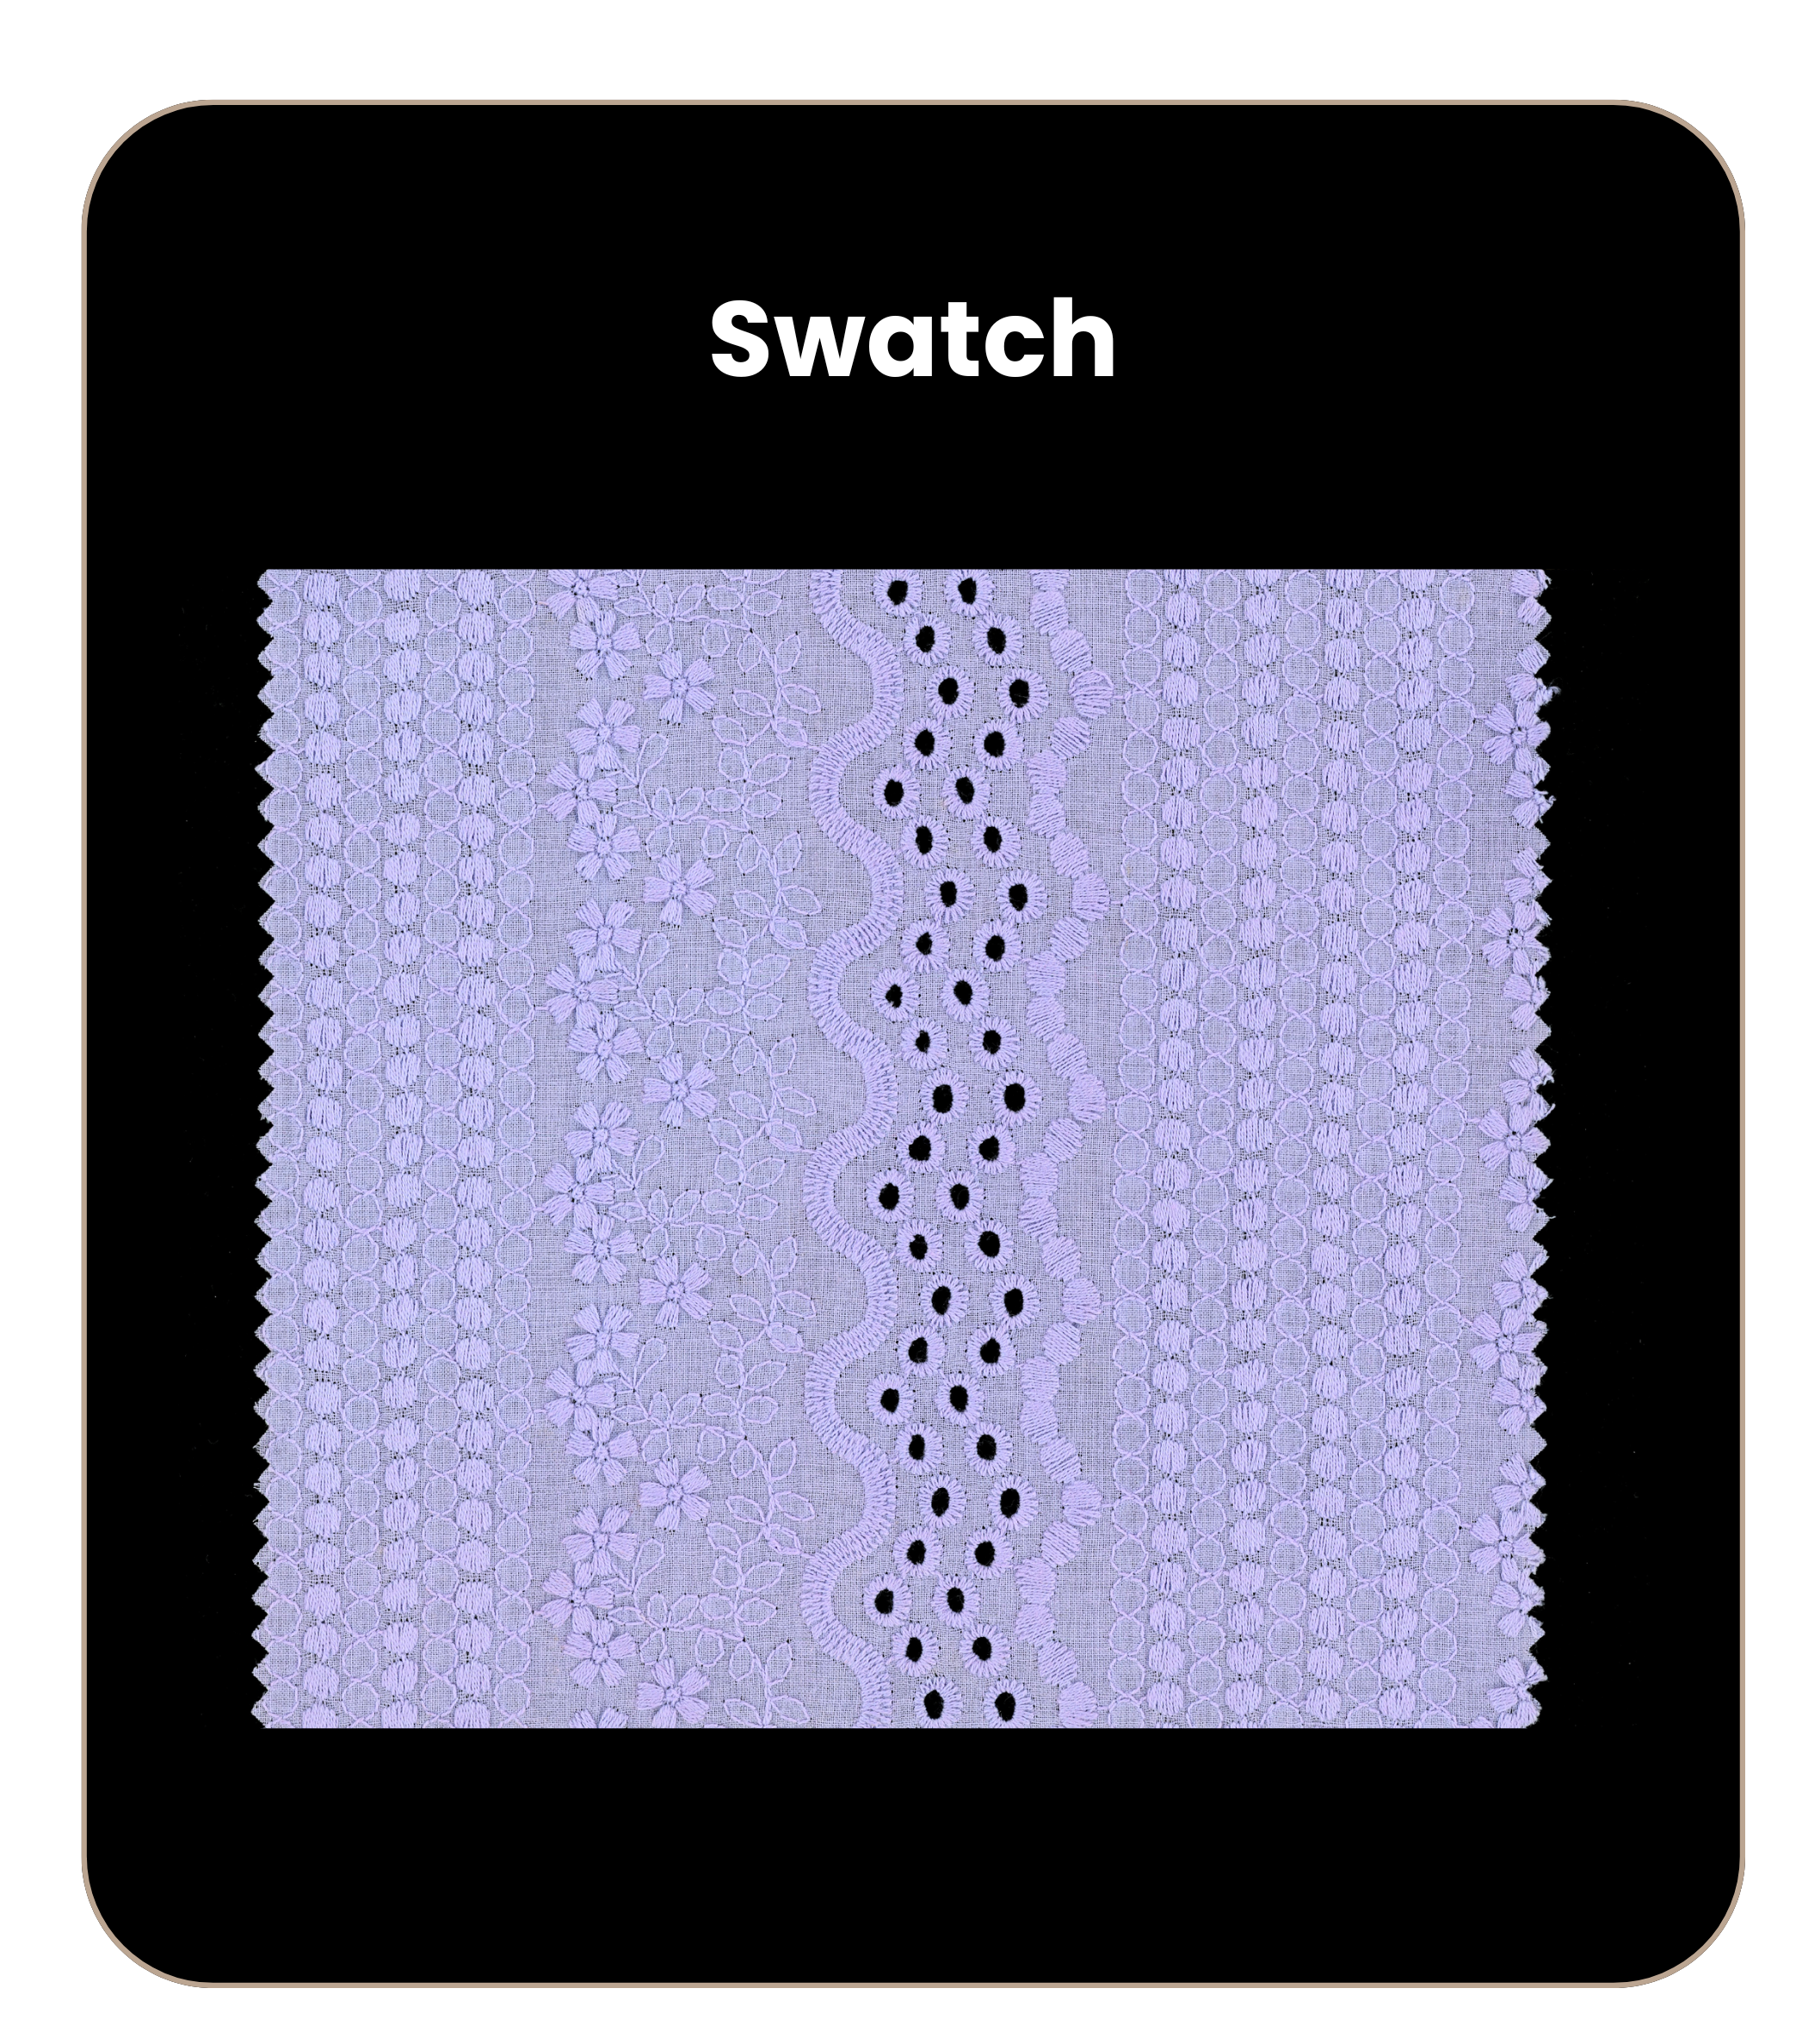

- Upload the Fabric
Use the Textilecloud™ system’s Smart Upload or Upload Pre-scanned Images method to upload your fabric. - Once uploaded, navigate to the Asset Library and select the asset.
- Start the 3D material creation process by clicking the [Edit] button and then the [Create] button in the 3D material creation panel.
✅Ensure the asset has a scanned image, the 3D creation quota is available, and all required fields are filled.
- The Preview window will then appear, prompting the following questions:
❓💬Is the material see-through? Enable the toggle button if your fabric has mesh/holes. Then, the following question will appear:
❓💬What is the color of the background? Choose your background color, whether it is White or Black.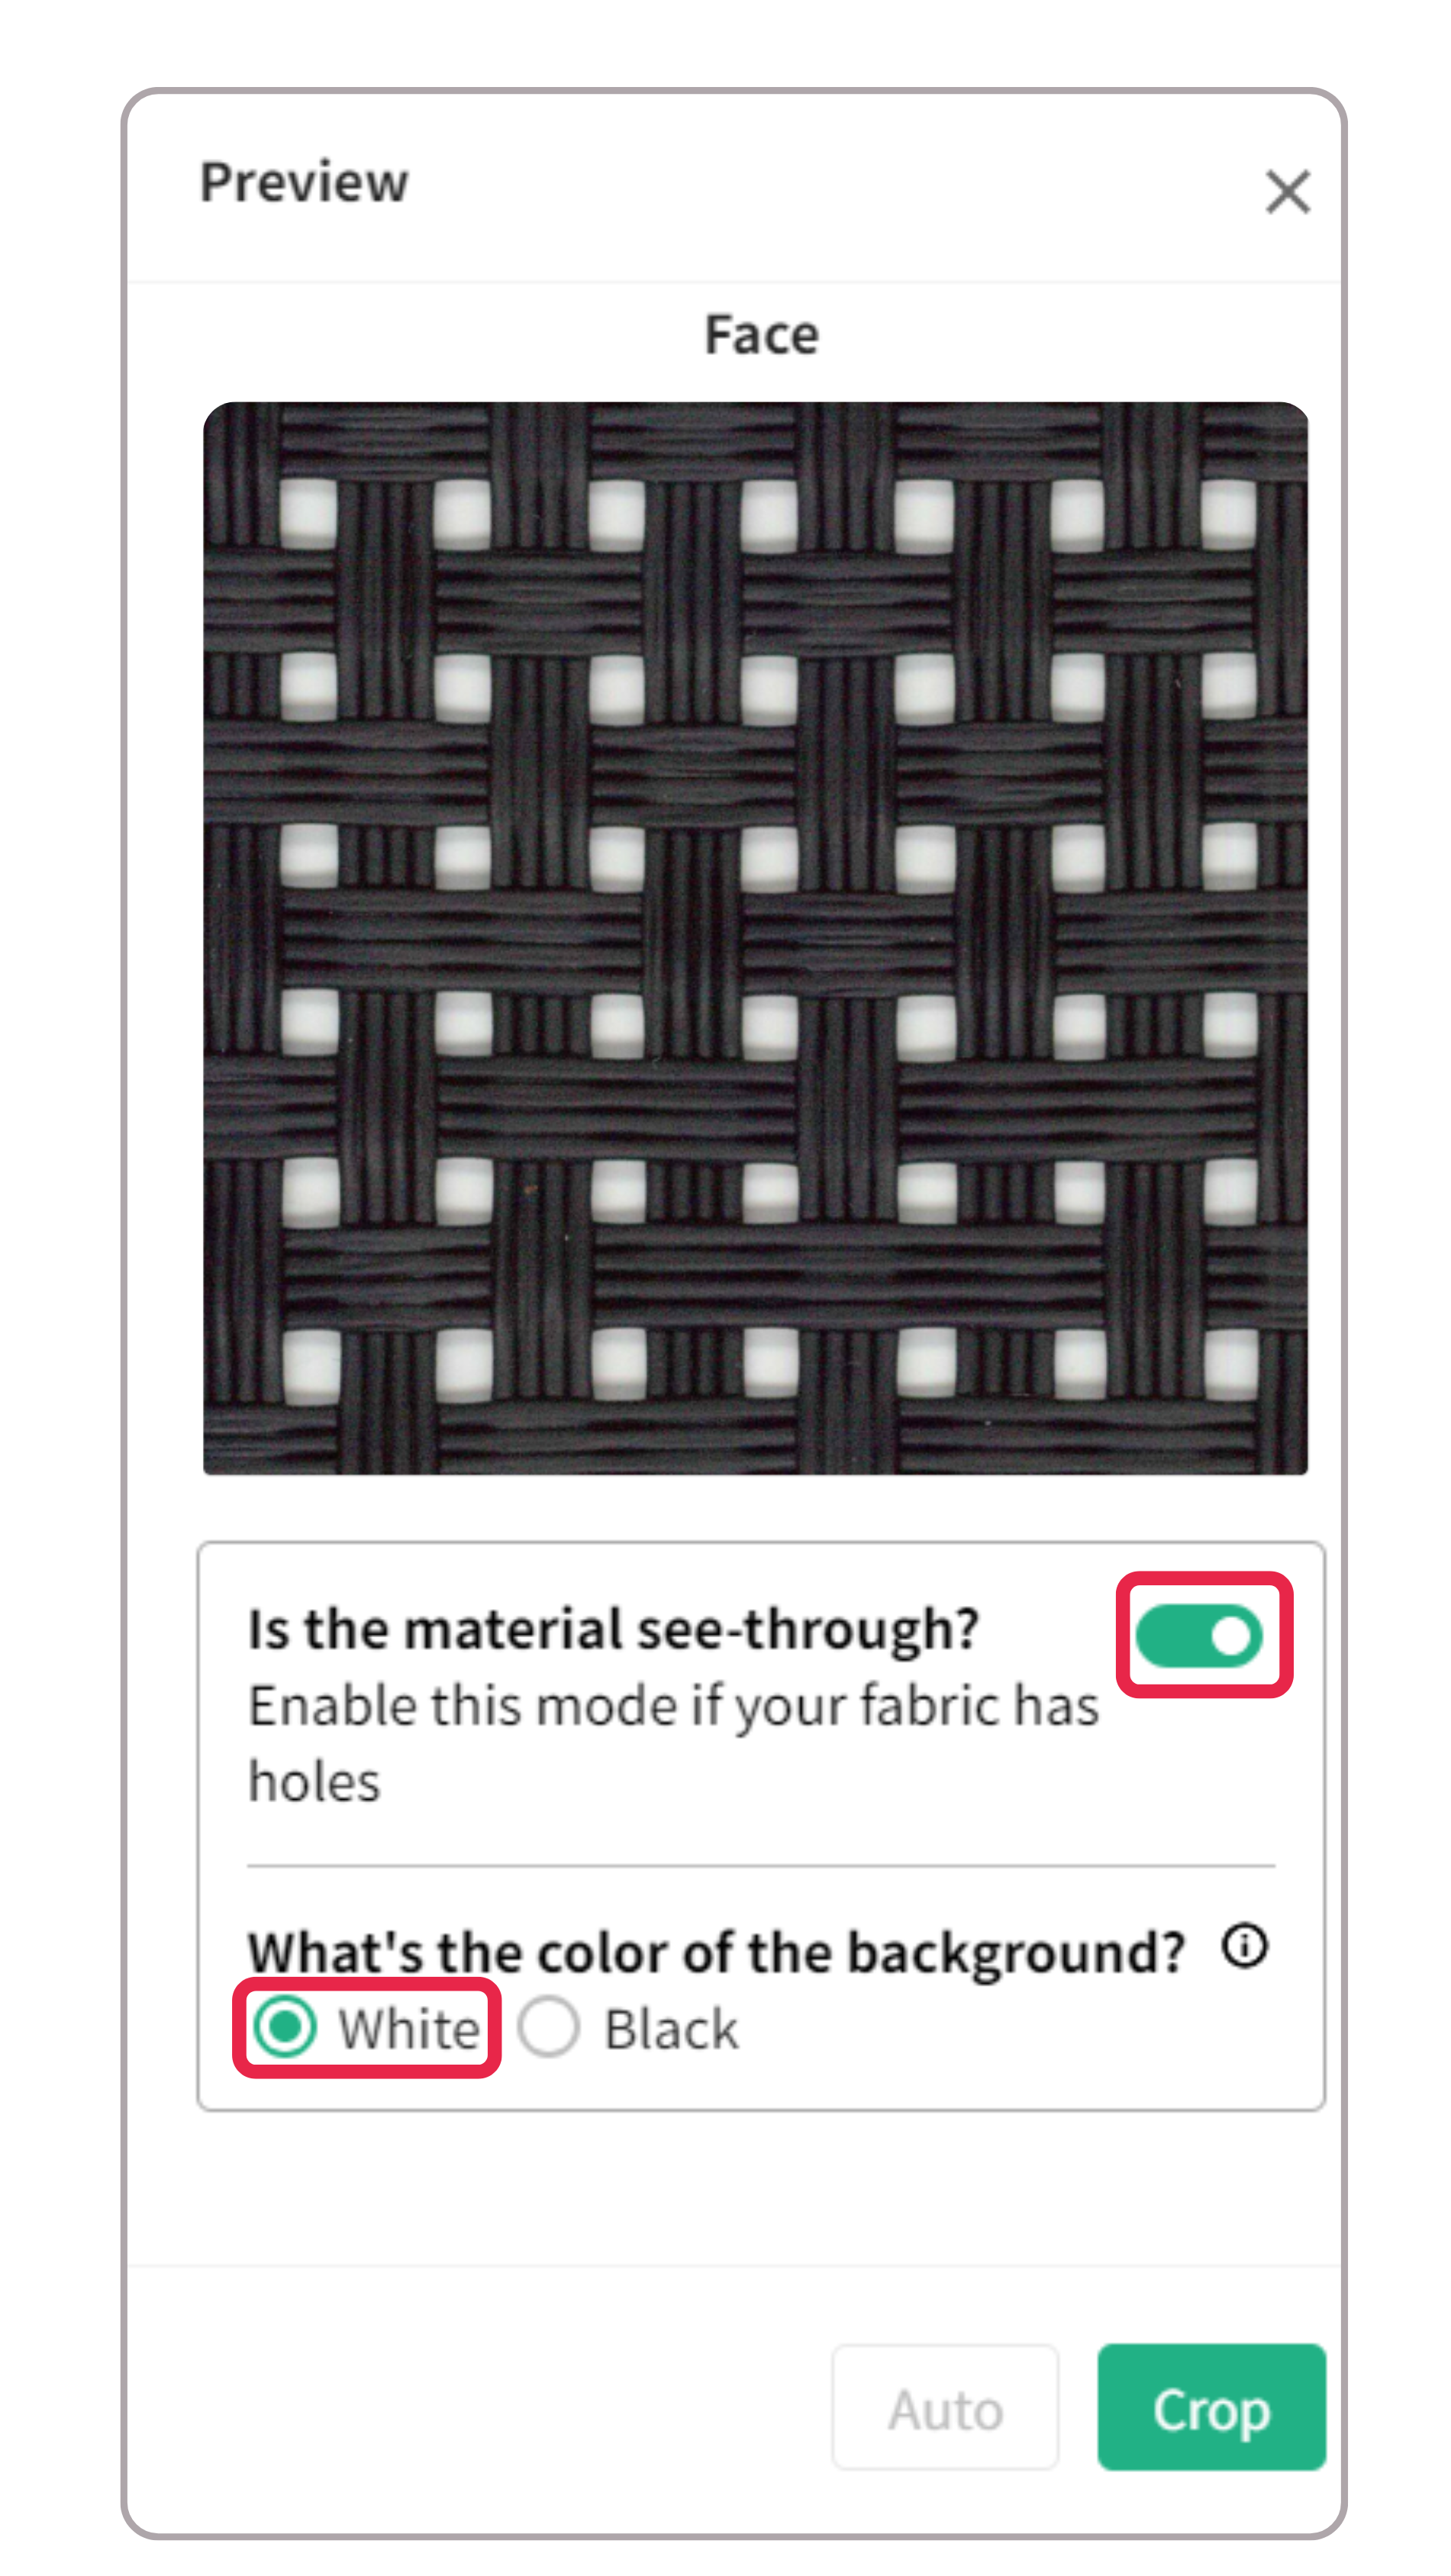
💡Tip: Use a contrasting color for the fabric and the swatch/background.
⤶ For instance, if the fabric is black, use a white swatch/background.
✨✅More concrete examples for fabric with holes:
● For vibrant, bold, and dark color fabric (e.g. blue, true red, black) please use the white background/swatch
● For light, soft, and delicate color fabric (e.g. light mauve, white, light apricot-white) please use the black background/swatch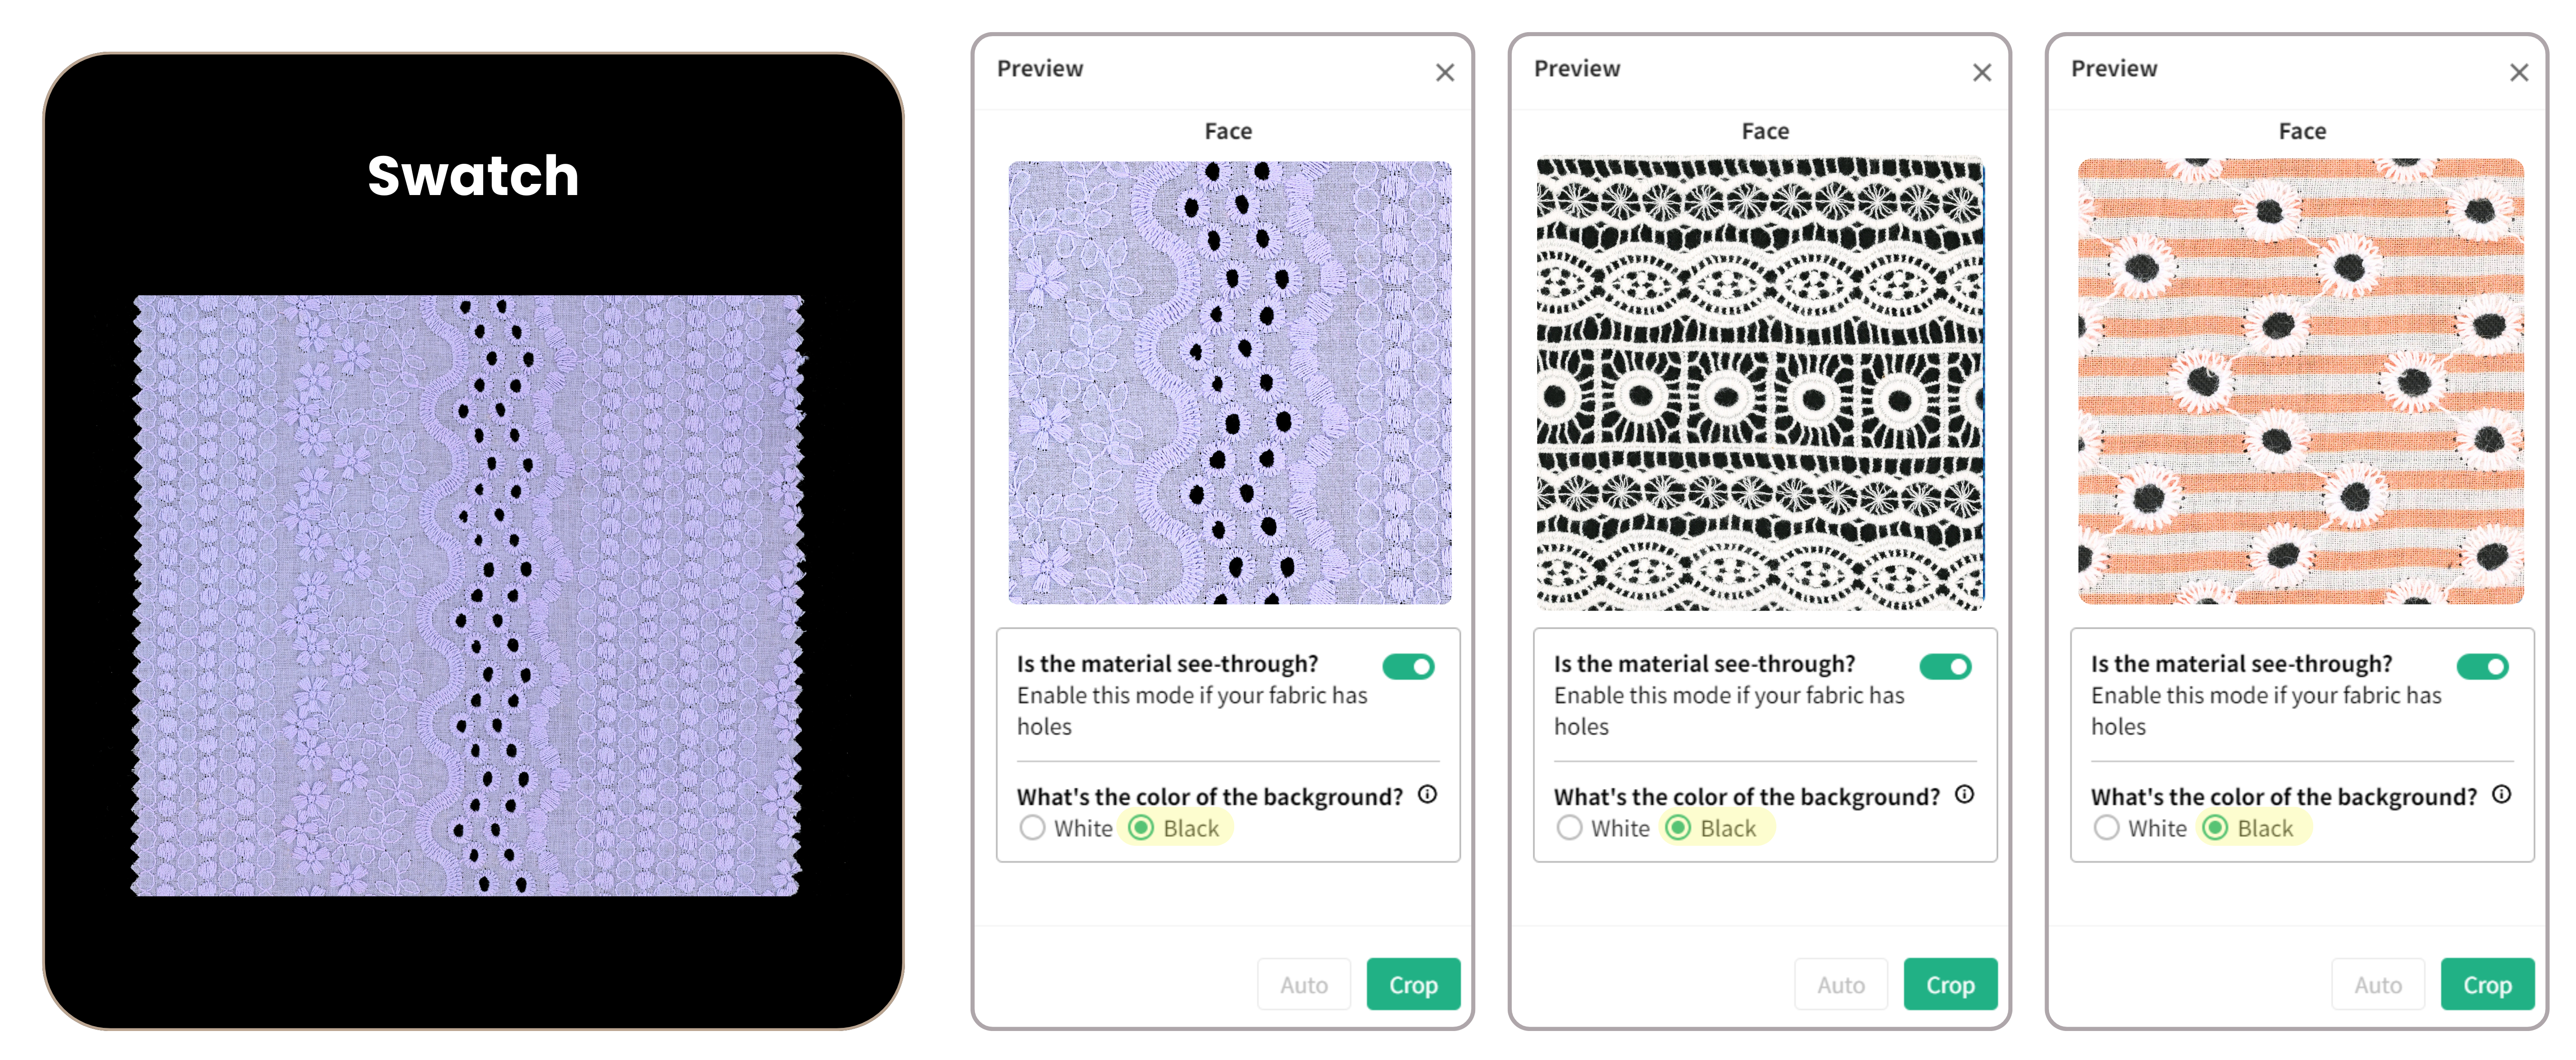
- Next, click on the [Crop] button and then use either the Cut or Perspective Cut tools to cut the pattern seamlessly.
- Once you finish cropping, click [Create] and wait for the 3D materials to be generated. You can track the status in the Progress Status Bar > 3D Materials.
- That's it!
You now have a fabric with mesh accurately represented in 3D Viewer. You can download the 3D files and utilize them in 3D design software to further explore on your design.
Conclusion
By following these best practices, you can accurately create 3D materials that represent fabrics with mesh. This streamlined process ensures realistic visualization, enhancing the quality of your 3D designs. Leveraging these tools improves your workflow, allowing you to produce high-quality, detailed 3D representations for various applications.
商店定位
-
標題
新增地址
-
標題
新增地址
-
標題
新增地址
產品標題範例
尺寸
顏色
Quantity